Convert Images to PDF: Formats, Page Size and Quality
To convert images to PDF, add the pictures to GrabCast Images to PDF, put them in page order, pick a page size, placement and quality preset, and click Create PDF; the file downloads in seconds and nothing is uploaded. Those three settings decide whether the result looks crisp on a Letter page or prints soft, and whether it weighs 800 KB or 40 MB. The converter accepts JPG, PNG, WebP, GIF and iPhone HEIC in one batch, previews every page exactly as it will be written, and builds the document in your browser tab with the open-source pdf-lib library. This guide explains what happens to each format inside the file, how many pixels a sharp page needs, when to fit or fill, and which preset suits receipts, design mockups, worksheets or a screenshot handout.
📚 Try the Images to PDF tool now — freeOpen →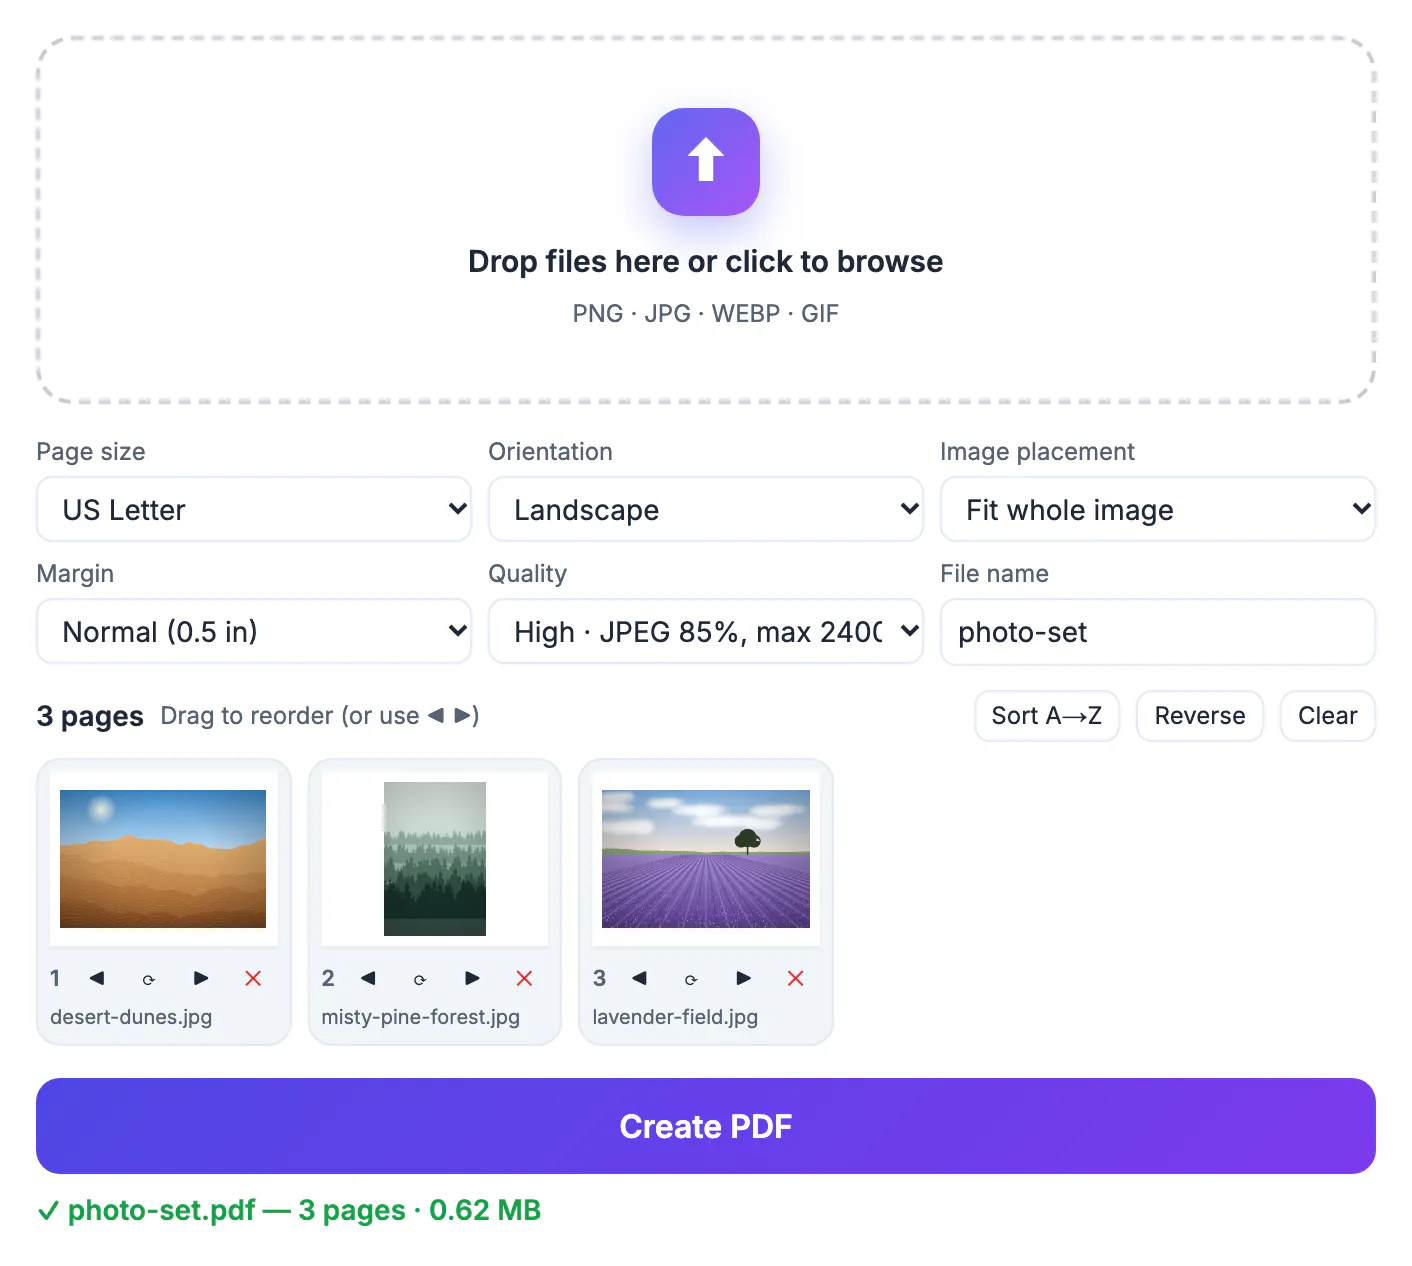
A PDF is a container, and the pictures inside it keep their own resolution and compression. Put a 1,200 pixel screenshot on a Letter page and it prints soft; put a 6,000 pixel camera file on the same page and the document balloons without looking any sharper. Transparent PNG logos can pick up a white box, a sideways phone photo becomes a sideways page, and HEIC shots from an iPhone may not open at all in older desktop software. Knowing the handful of numbers below lets you predict the result before you click Create PDF instead of guessing, exporting and trying again. It also explains why two converters can produce files of very different size from the same set of pictures.
What happens to each format when you convert images to PDF
The tool treats each picture type differently, and the Quality menu changes the rules.
- JPG and PNG with the Original preset are embedded byte for byte, with no recompression and no quality loss.
- PNG transparency survives only with Original; High and Smaller file flatten it onto white, which is usually what a printed page wants anyway.
- WebP and GIF are re-encoded as high-quality JPEG even with Original, because a PDF cannot hold those formats directly; an animated GIF contributes its first frame only.
- iPhone HEIC and HEIF photos are decoded in the browser and then placed like any other photo, so no separate HEIC converter is needed.
Rotating a page with the rotate button re-encodes that page at full resolution, since the pixels have to be turned. If a picture fails to decode, for example a half-finished download, the status line names it and the remaining pages are still built. Mixing formats in one batch is fine: a JPG receipt, a PNG chart and a HEIC photo can sit side by side in the same document.
Page size in points and pixels
PDF pages are measured in points, 72 to the inch. The presets map to these sizes before margins are applied.
- US Letter: 612 by 792 points, 8.5 by 11 inches. US Legal: 612 by 1,008 points, 8.5 by 14 inches.
- A4: 595 by 842 points, 210 by 297 mm. A5: 420 by 595 points, half of A4, handy for booklets and planners.
- Margins: None, 0.25 inch (18 points), 0.5 inch (36 points) or 1 inch (72 points) on every side.
- Fit to image makes each page exactly as many points as the picture has pixels, plus the margin, so page sizes can vary through the document.
For a sharp print, aim for about 300 pixels per inch of printed area. A Letter page with 0.5 inch margins leaves a 7.5 by 10 inch box, so a full-page picture needs roughly 2,250 by 3,000 pixels. For on-screen reading, 150 pixels per inch is plenty, around 1,100 by 1,500 pixels. Most phone cameras shoot 3,000 to 4,000 pixels on the long edge, which is more than enough; small web images and thumbnails are where softness creeps in.
Fit whole image versus fill page
Placement decides whether you see every edge or get a borderless look.
- Fit whole image scales the picture until one side touches the margin box and centers it, leaving white bands if the proportions differ from the page.
- Fill page scales until both sides cover the box and crops whatever overflows, which suits full-bleed photos and slide exports.
- Orientation Auto turns each page landscape when its picture is wider than tall; Portrait or Landscape forces every page the same way.
- The thumbnails use the same math as the writer, so any cropping you see in the preview is exactly what the document will contain.
A 16:9 screenshot on a portrait Letter page with Fit leaves more than half the page empty; switch Orientation to Landscape or Auto and it fills the width. With Fill on a portrait page, the same screenshot loses more than half of its width, so reserve Fill for pictures already shaped close to the page, such as 3:4 phone photos on Letter.
Choosing a quality preset by use
The three presets trade resolution against size in predictable ways, and the right one depends on where the document is going.
- Original: best for scans, line art and screenshots already sized sensibly; output is roughly the sum of the input files.
- High: JPEG at 85 percent with the long edge capped at 2,400 pixels, about 240 pixels per inch across a 10 inch printable height, sharp enough for most prints.
- Smaller file: JPEG at 70 percent capped at 1,600 pixels, ideal for email, expense portals and on-screen reading.
- Screenshots of text: prefer Original, since JPEG compression can blur thin lettering and colored interface edges.
As a rough guide, ten phone photos saved with Smaller file usually land in the low single-digit megabytes, while the same ten with Original can pass 30 MB. The status line shows the page count and file size after each build, so you can switch presets and rebuild in seconds. Because the document is created entirely in the tab, client mockups, pay stubs and unreleased designs stay on your machine. If a portal still rejects the result, Compress PDF can shrink the embedded pictures further.
If the pages are scans, the OCR PDF tool adds searchable text to the finished file.
▶ Watch: How to convert images to PDF (0:36)
Video transcript
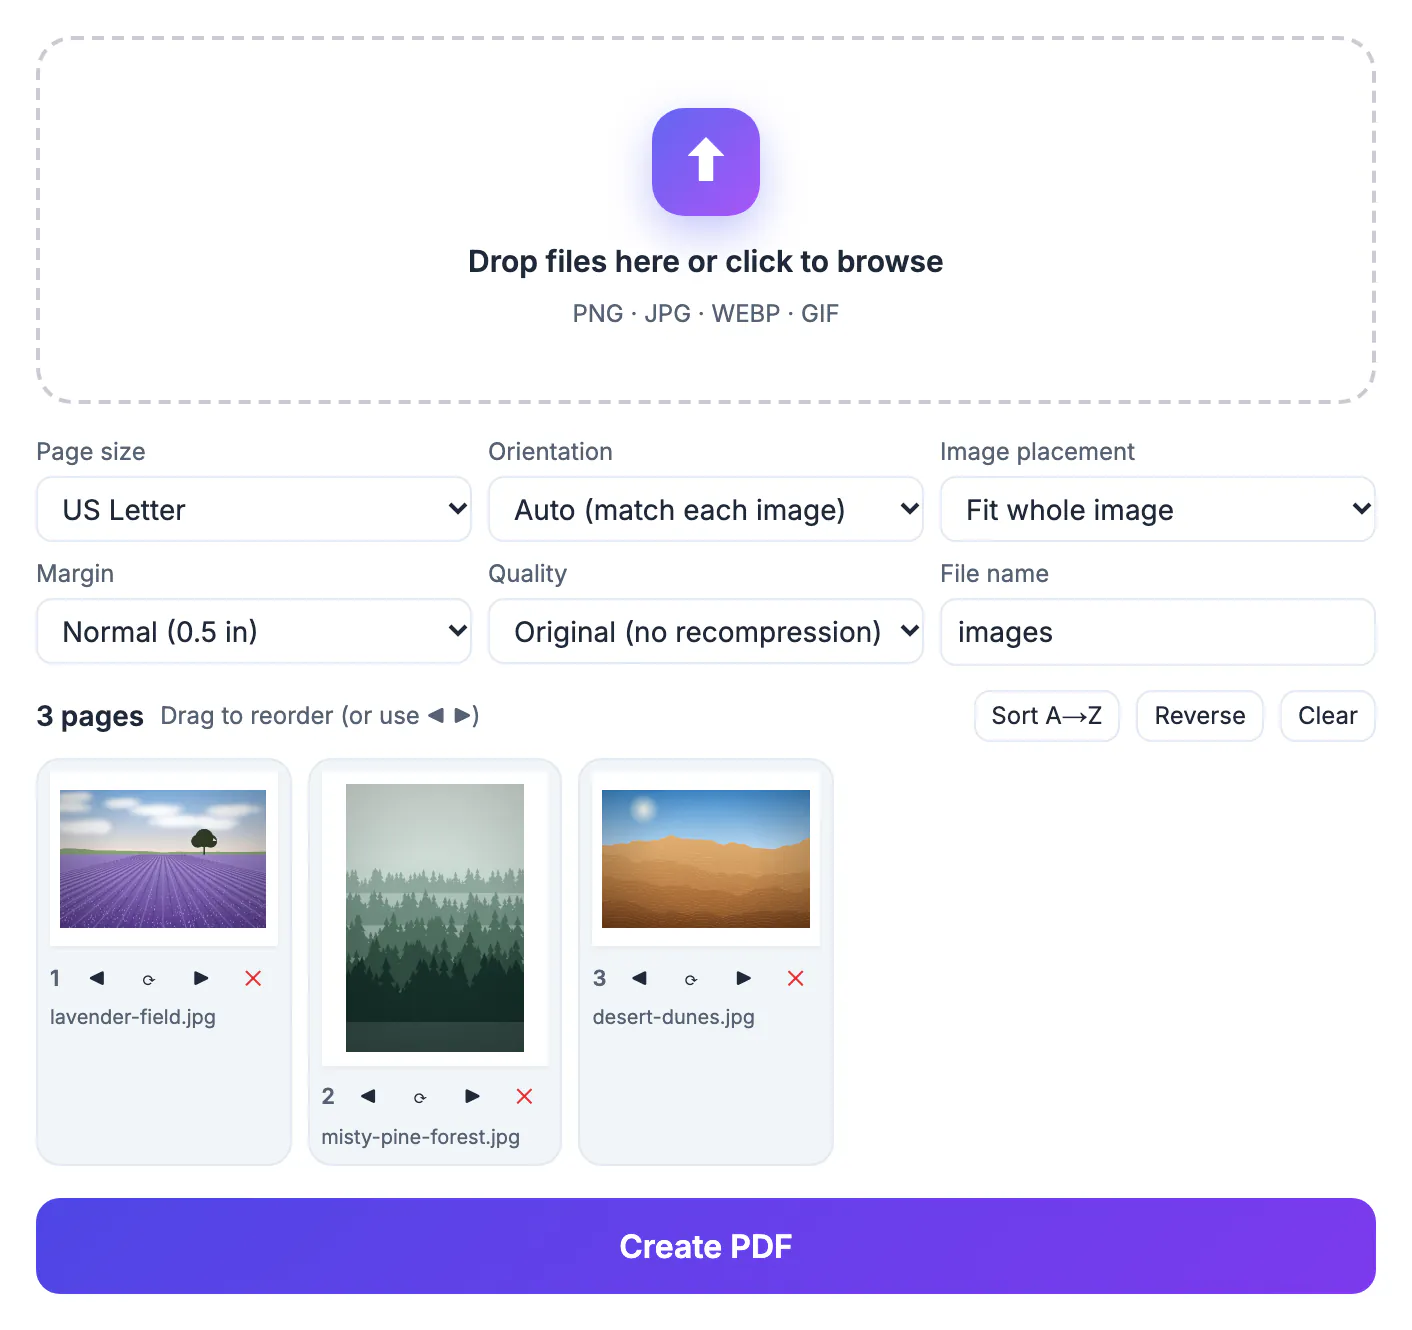
- Add your images. Pick all your photos at once. Each one becomes a page.
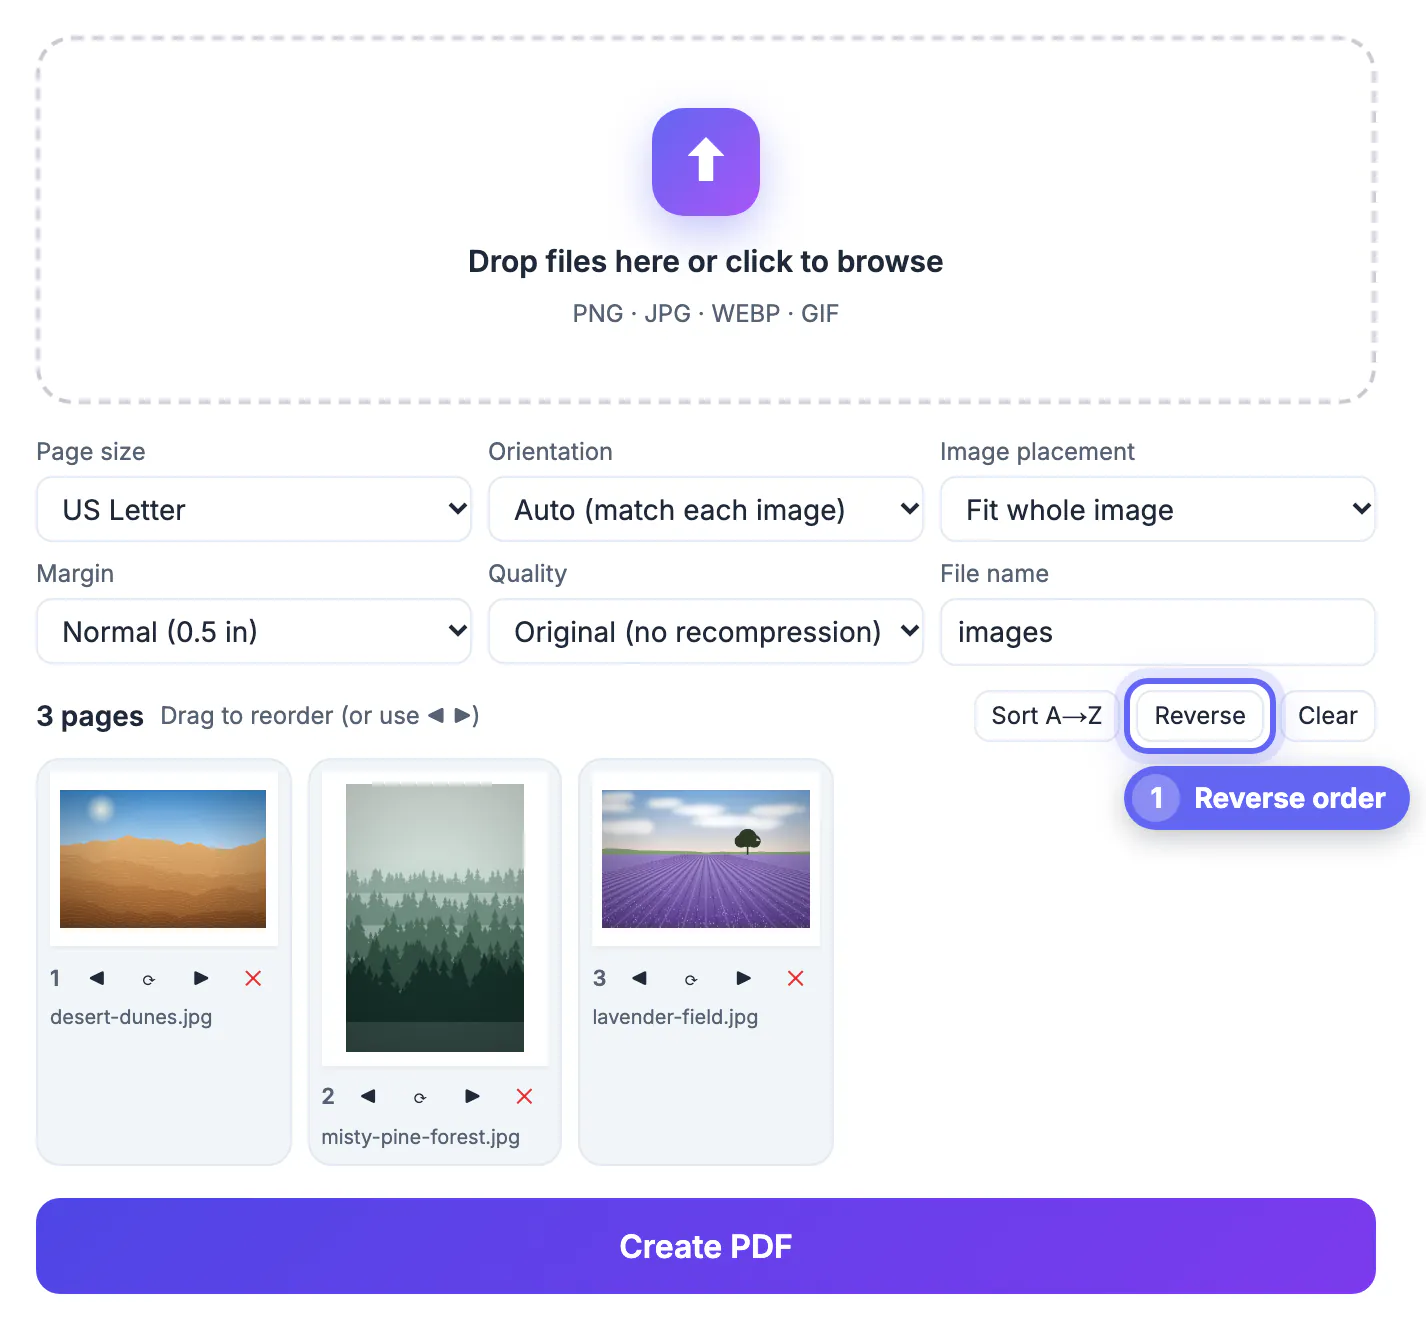
- Check the page order. Use the arrows to move a page, or rotate and remove pages.
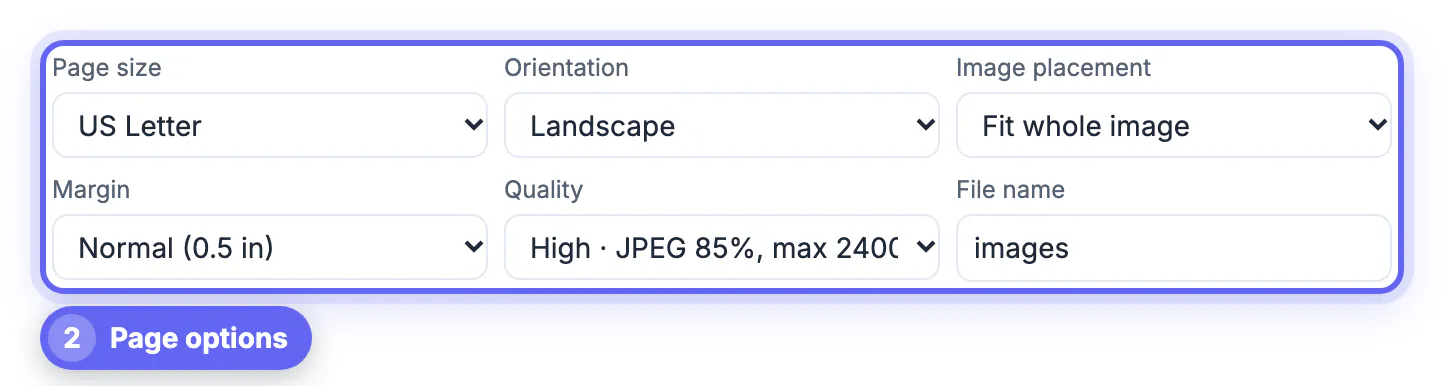
- Choose the page size. US Letter for printing in the US, A4 elsewhere, or fit each page to its image.
- Name the PDF. Give the file a name you will recognize later.
- Create the PDF. Photos keep their full quality, and portrait shots stay upright.
Step-by-step
Common mistakes to avoid
Pro tips
Frequently asked questions
Which image formats can I convert to PDF?
JPG, PNG, WebP, GIF and HEIC or HEIF. JPG and PNG can be embedded as they are with the Original preset; the others are converted to high-quality JPEG in the browser first.
Does converting reduce image quality?
With Original, JPG and PNG pictures are not recompressed at all. High and Smaller file resize and re-encode on purpose to cut the file size, which is usually invisible on screen.
Is there a limit on how many images I can add?
There is no fixed page limit and no watermark. The practical ceiling is your device memory, so for large batches of phone photos choose High or Smaller file to keep the result manageable.
Why is my page so large with Fit to image?
Fit to image uses one point per pixel, so a 4,000 pixel wide photo creates a page more than 55 inches wide. Choose Letter or A4 for documents that will be printed or reviewed.
Are my images uploaded to a server?
No. Decoding, HEIC conversion and PDF writing all run in your browser tab, so receipts, IDs and private designs never leave your device.
To convert images to PDF well, match the page size to the destination, use Fit unless the picture already shares the page shape, and pick Original for screenshots, High for print and Smaller file for email. With about 300 pixels per printed inch and the right preset, the finished pages look as good as the pictures you started with, and none of them leave your computer.
Related guides
Browse more: all PDF guides · the Images to PDF tool