How to Scan Documents With Your Phone (Free, to PDF or Text)
To scan a document with your phone, photograph the page flat in good light, open it in a scan tool, drag the four corners onto the page edges, choose a filter and save it as a PDF. GrabCast's free Scan to PDF does this in your browser: it finds the edges automatically, straightens the page and cleans up the color, and nothing is uploaded. In the example a hotel receipt photographed on a dark table became a clean one-page A4 PDF of 0.04 MB. This guide covers how to take a good photo, the filters (Original, Enhanced, Grayscale, B&W), page size and quality settings, and how to make the scan searchable afterwards.
📷 Try Scan to PDF now — freeOpen →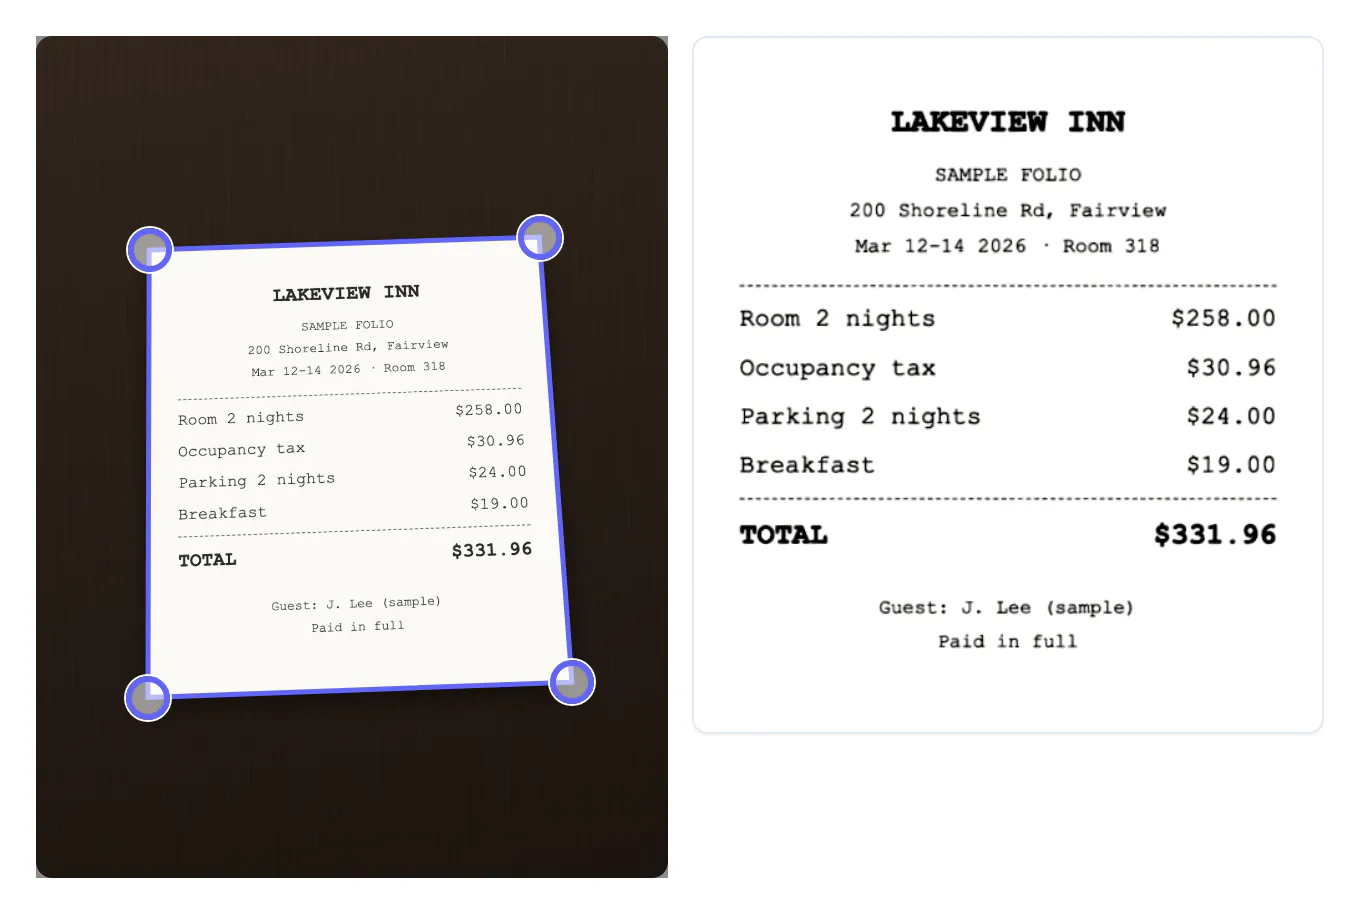
A photo of a page is slanted, has a dark background, uneven light and takes a lot of storage. A scan crops to the page, flattens the perspective and makes the paper white and the text dark, so it is readable on any screen and prints properly. Many offices and portals accept a PDF but not a photo, and a multi-page PDF is easier to send than a folder of pictures.
Take the photo
Put the document on a plain, darker surface so the edges stand out. Use daylight or a lamp from the side, and avoid your own shadow. Hold the phone directly above, parallel to the page, and make the whole page fit with a little margin. Tap to focus on the text and hold still. For a book or a bound document, press it flat and photograph each page. Cover any sensitive details you do not need.
Set the corners
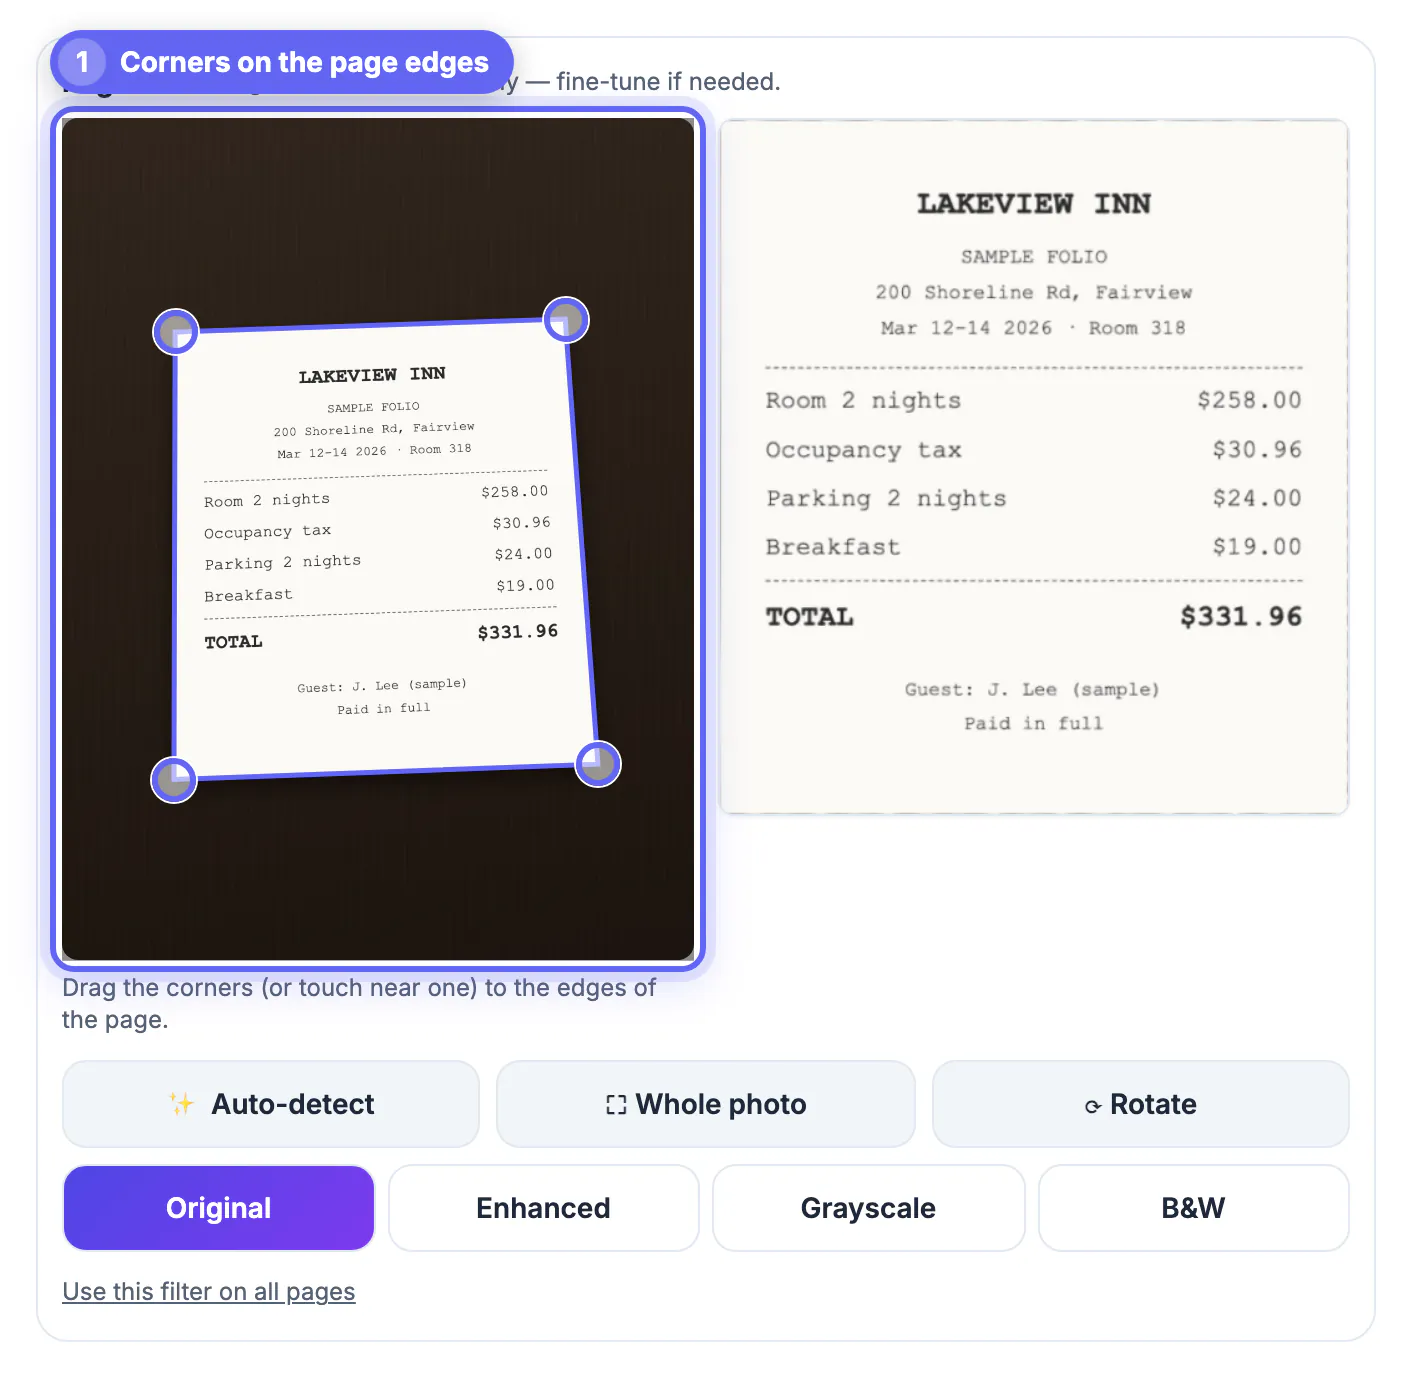
After you add the photo the tool shows two views: the original with four corner handles and the cropped page. Corners are placed automatically. If one is off, drag it to the edge of the page; the right-hand preview follows. Buttons under the photo let you use auto-detect again, take the whole photo or rotate the page. In the example the corners sat on the receipt's edges and the preview showed the receipt straightened.
Choose a filter
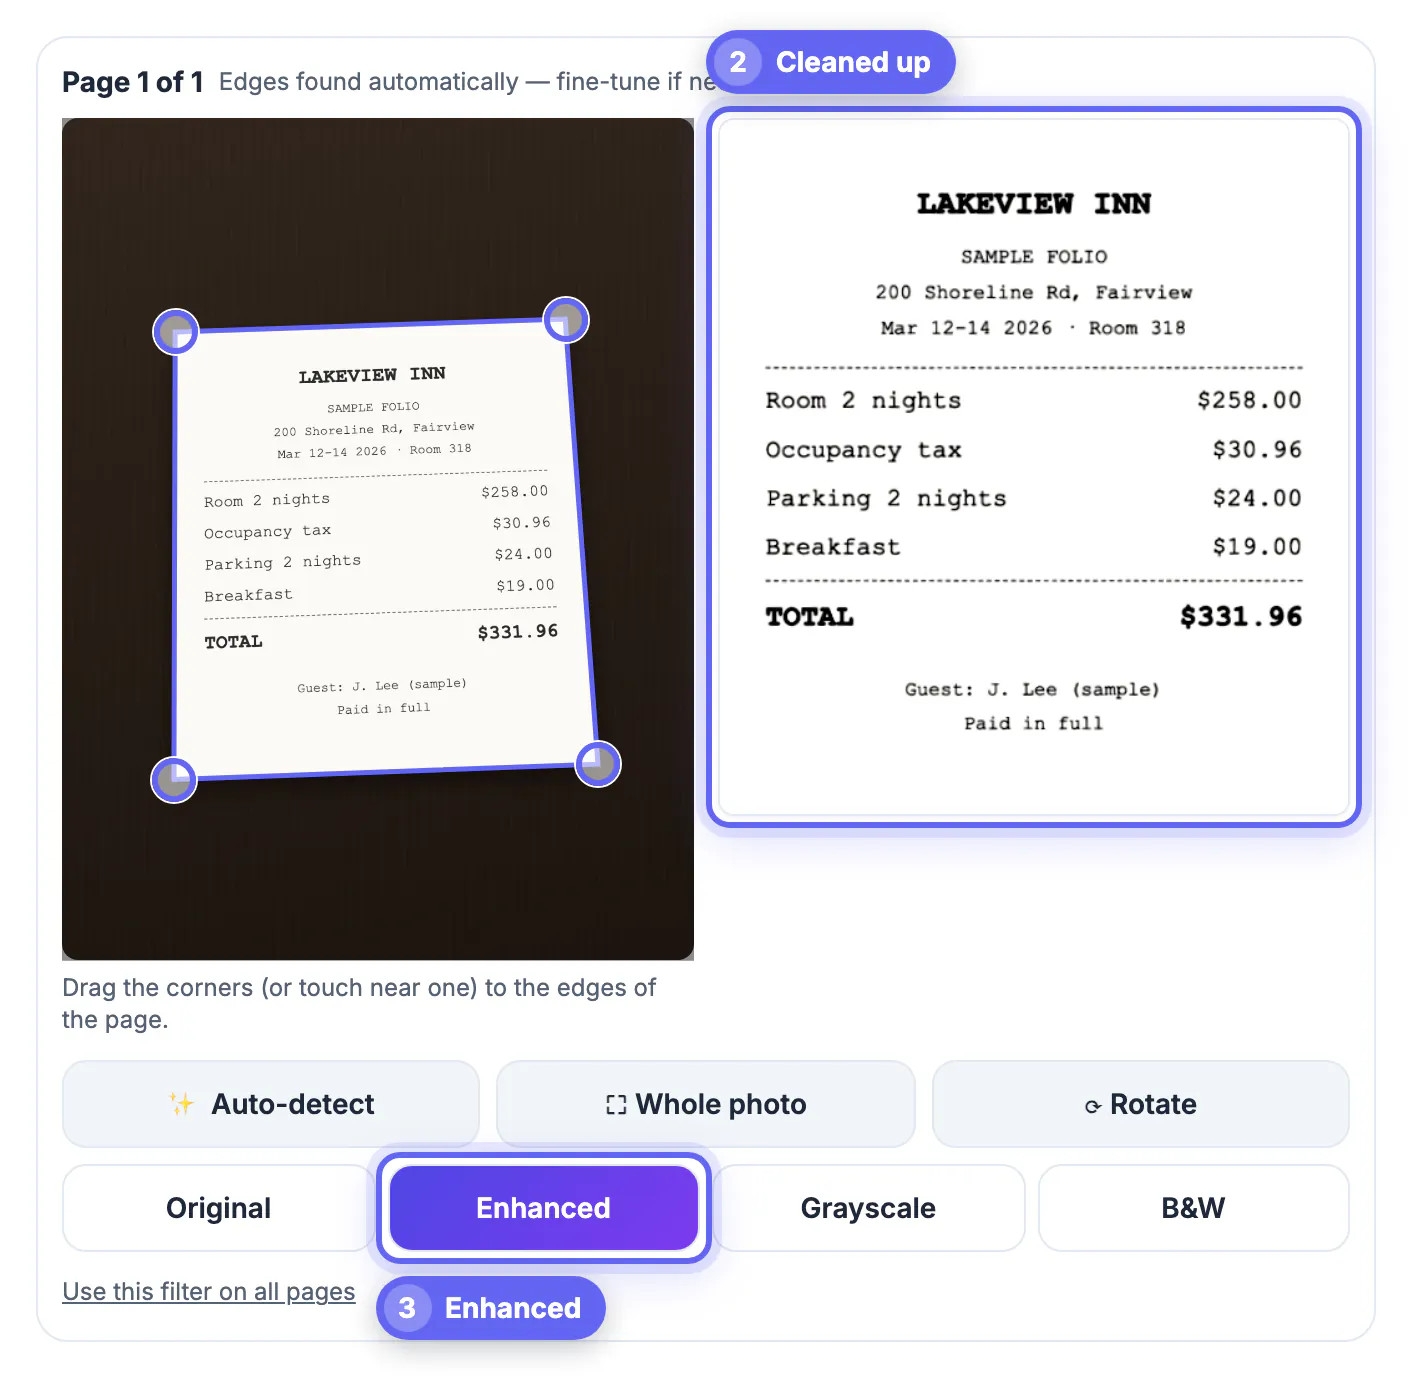
The four filters suit different documents:
- Original: the untouched colors, right for photos and colored stamps.
- Enhanced: whitens the paper and darkens the text, the best choice for most printed documents and the one used for the receipt.
- Grayscale: removes color and keeps shading, good for pages with light images.
- B&W: pure black and white, the smallest files and best for text on shadowed pages.
Use the link below the filter buttons to apply your choice to all pages of a multi-page scan.
Page size, quality and searchable text
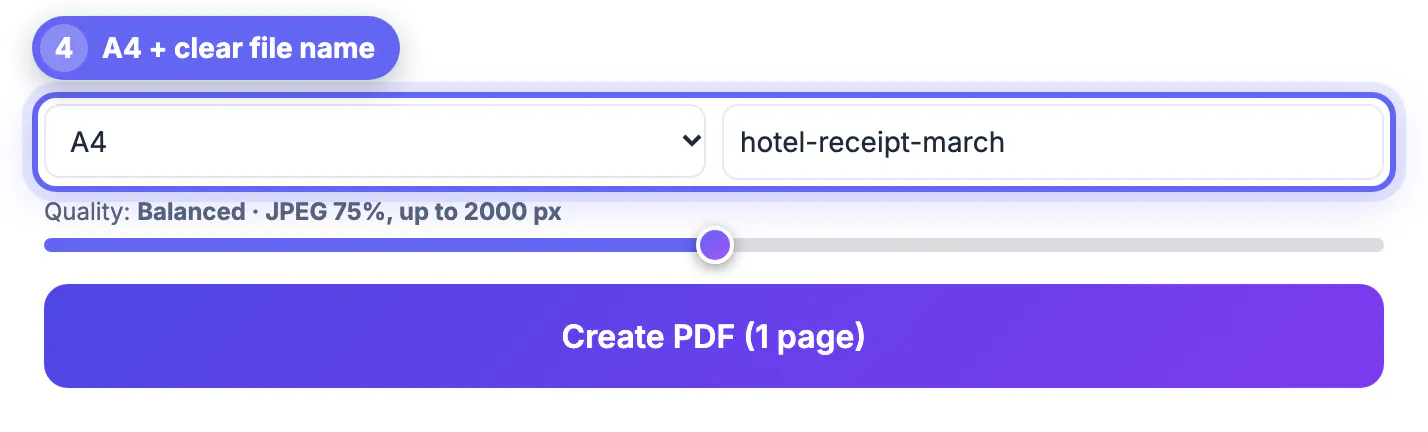
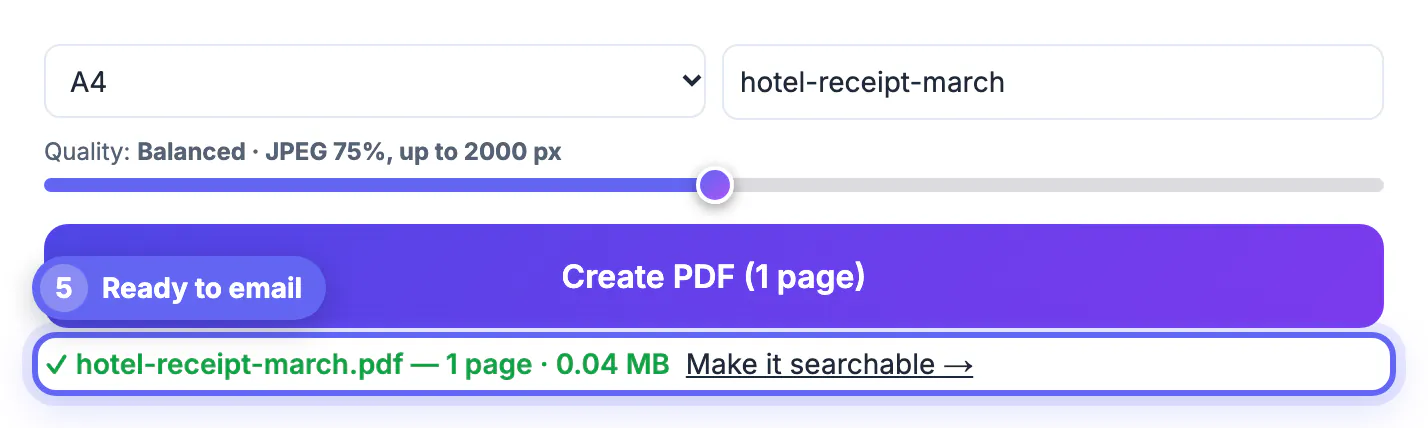
Choose a page size (A4 or Letter), type a clear file name such as hotel-receipt-march and check the quality line: Balanced means JPEG 75 percent up to 2000 pixels, which kept the example receipt at 0.04 MB. Click Create PDF; the status shows the name, page count and size, and a Make it searchable link that opens OCR. A searchable PDF lets you find and copy words; see OCR PDF. To add more pages, photograph them and repeat; for a signed form see how to convert a photo to PDF.
Scanning several pages and keeping files tidy
For a multi-page document, add all the photos at once and check the page order in the list before creating the PDF. Use the same filter for every page so the paper looks consistent; the link under the filter buttons applies your choice to all pages. Name the file with the date and subject (2026-03-hotel-receipt) so it sorts and can be found later.
Store scans in a folder that is backed up, and delete the original photos when you are sure the PDF is complete, since photos of documents often contain personal details. For anything that includes signatures, ID numbers or bank details, avoid sending it by chat apps that keep copies, and prefer an encrypted or access-controlled channel. Keep the paper original if the law or the recipient requires it.
Documents that need extra care
Different paperwork brings different challenges. Receipts curl and fade, so flatten them under a book first. Glossy cards reflect light, so tilt slightly and use indirect lamp light. Books and bound pages curve near the spine, which distorts lines; scan one sheet at a time or press the book flat. For passports and IDs, cover the other side and share only with authorised recipients.
- Contracts: scan every sheet including blank ones if the agreement says so.
- Receipts: capture the total and date clearly.
- Handwritten notes: use the Enhanced filter and high contrast.
- IDs: add a watermark stating the purpose before sending.
To turn pictures into editable words, extracting words from an image with OCR and comparing OCR with a scanner app help you choose, while converting a photo to PDF covers the simplest case.
Storing and sending scans safely
Scans often contain sensitive details. Save them in an encrypted folder, delete the original photos from your gallery and password protect any PDF you send. Use clear names with dates, such as lease-2026-03.pdf, and avoid putting account numbers in file names.
Good habits for a tidy scanned archive
Name each file with the date and a short description, group them into folders by year and keep a backup in a second place. Delete duplicates after checking the PDF opens correctly, and note anywhere an original must be retained, such as a signed contract or a deed. Review the archive once a year to remove papers you no longer need to keep.
Step-by-step
Common mistakes to avoid
Pro tips
Frequently asked questions
How do I scan a document with my phone?
Photograph it flat in good light, add the photo to Scan to PDF, set the corners, choose a filter and create the PDF.
Which filter is best?
Enhanced for most printed pages, B&W for text with shadows, Original for photos.
Is my document uploaded?
No. Scanning and PDF creation happen in your browser.
Can I scan several pages?
Yes. Add each photo as a page and create one PDF.
Can the PDF be searchable?
Use the Make it searchable link, which opens OCR PDF.
A good phone scan is a flat, evenly lit photo, corners on the page edges, the right filter and a clear file name. It takes about a minute and gives a small, clean PDF that is accepted almost everywhere.
Related guides
Browse more: all PDF guides · Scan to PDF