PNG vs WebP: Which Should You Use? (Website Speed Guide)
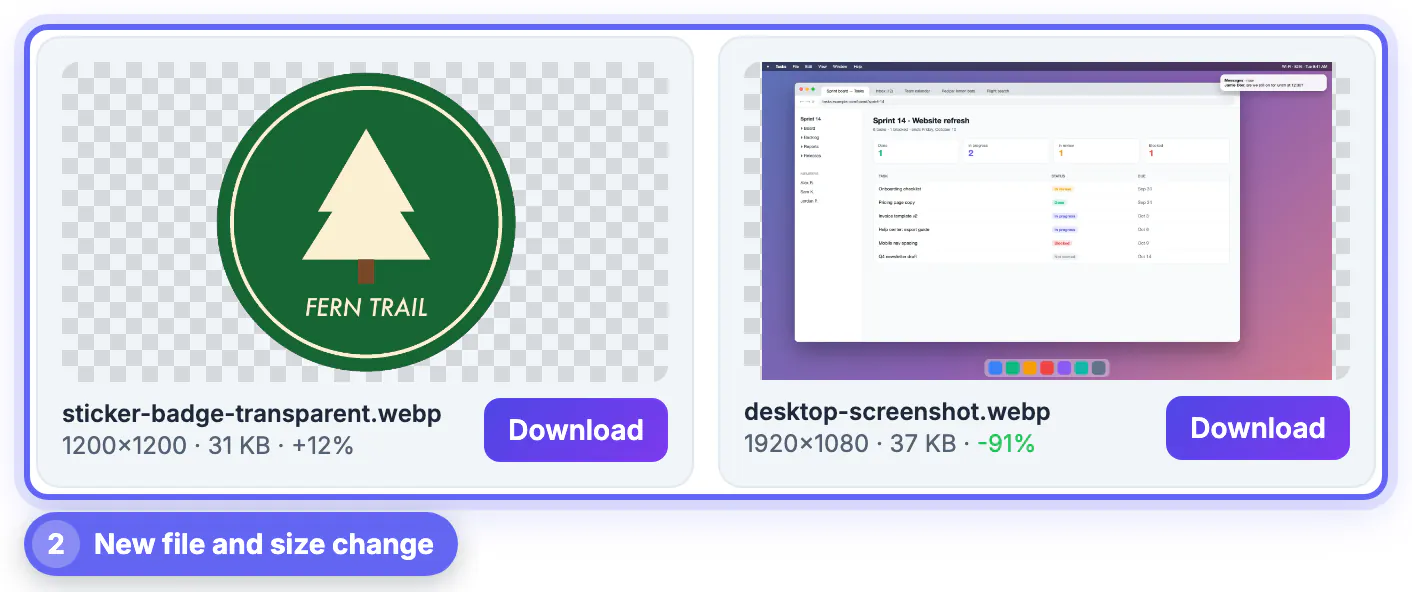
Use PNG when you need lossless quality or maximum compatibility, and WebP when you want a smaller file on the web; WebP can be lossless too and also supports transparency. In a test with GrabCast's image converter at quality 80, a 1920 × 1080 desktop screenshot dropped from PNG to a 37 KB WebP (91 percent smaller), while a small transparent sticker went from PNG to a 31 KB WebP that was 12 percent larger. So the answer depends on the image. This guide compares the two formats on size, quality, transparency, support and editing, and gives a simple rule for choosing.
⚡ Try Image to WEBP Converter now — freeOpen →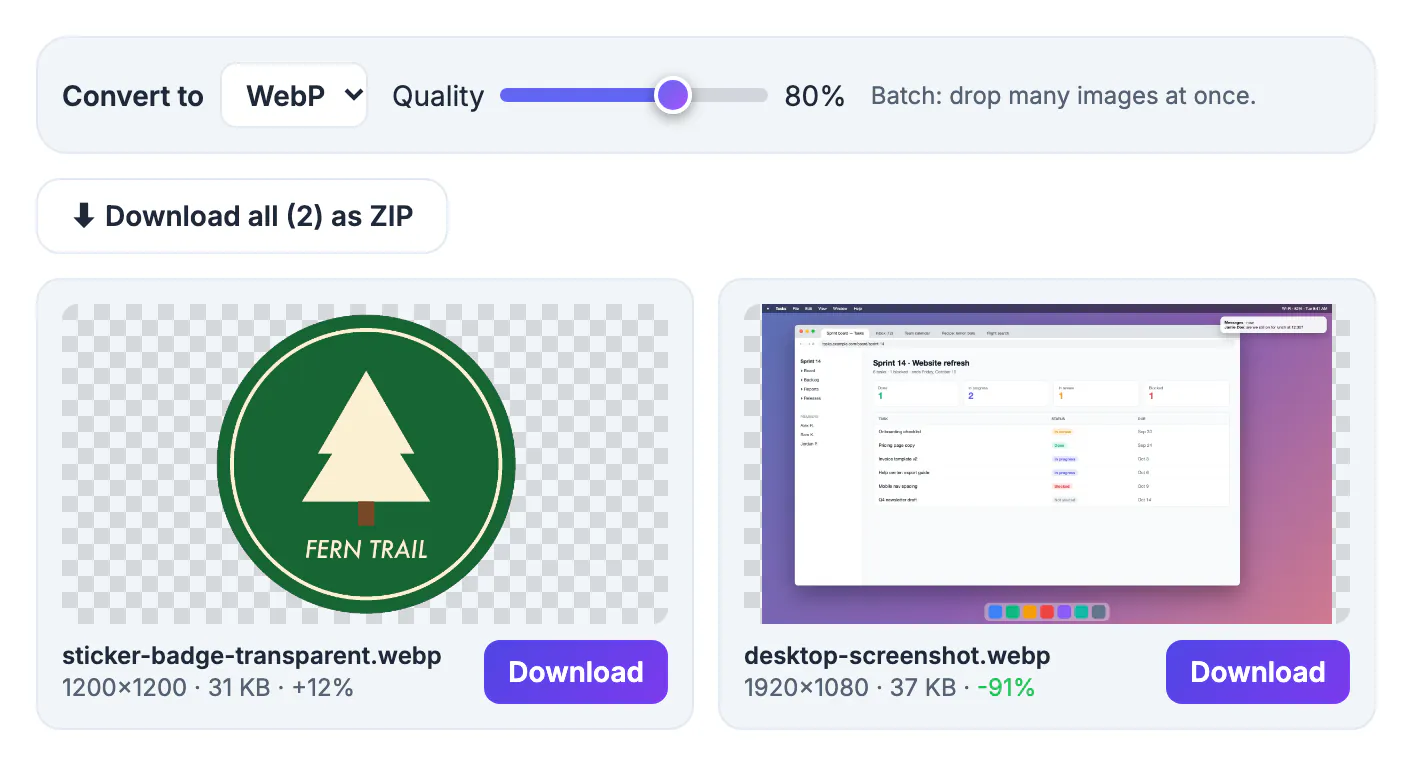
Both formats support transparency and sharp edges, so people use them for logos, icons, screenshots and UI graphics. The difference is file size and what opens the file. On a website, smaller images load faster; in a design workflow, a format that every program opens is safer. Testing your own files takes seconds, and the numbers can surprise you.
How PNG and WebP differ
- PNG is always lossless: every pixel is stored, and saving again never degrades it. Supported by essentially every browser, editor, printer and operating system.
- WebP can be lossy or lossless, supports transparency and animation and is often much smaller. All current major browsers support it, but some older editors, print services and forms do not.
- Quality: lossless WebP matches PNG exactly; lossy WebP at a high setting is visually close but discards fine detail.
What our test showed
Two PNGs were converted at WebP quality 80:
- A 1920 × 1080 desktop screenshot became a 37 KB WebP, 91 percent smaller than the PNG.
- A 1200 × 1200 sticker with a transparent background became a 31 KB WebP, 12 percent larger than the PNG.
Screenshots with gradients and photo-like areas compress far better in the newer format; a flat, simple graphic can already be tiny in the older one, and extra overhead can make a converted copy slightly bigger. Always look at the size change the tool prints next to each file before you decide.
When to choose each
- Choose WebP for website photos, screenshots, hero images and anything where load time counts and you control where it will be displayed.
- Choose PNG for source files you will edit again, images that must open in any program, print work and very small flat graphics.
- Keep both when you publish: PNG as the master, WebP as the web copy.
For photos with no transparency, JPG is another option; see WebP vs JPG.
Converting between them
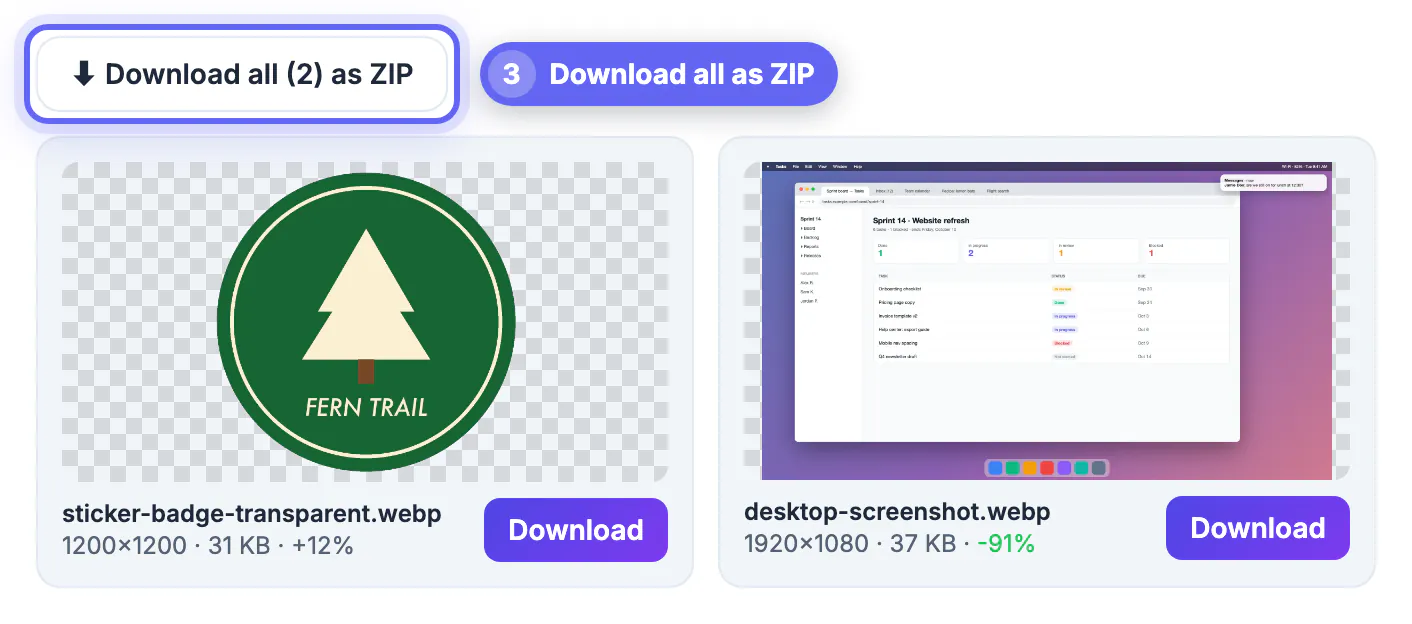
PNG to WebP: add the file to the Image to WebP tool, choose WebP and a quality (80 is a good start) and compare sizes. WebP to PNG: use the WebP to PNG guide; expect a much larger file. Transparency survives both directions. Never rename a file by hand; a changed extension does not change the format. For batch work drop many files and download the ZIP. All conversion is done locally, so private screenshots stay on your device.
Common scenarios
- Website screenshots and tutorials: WebP, at quality 80 to 85, usually saves the most; keep PNGs of the source.
- App icons and tiny logos: test both; small flat graphics may be smaller in the older format, and app stores often insist on it.
- Images with transparency for slides: PNG is safest across presentation programs.
- Email attachments: the older format opens everywhere; the newer one may not preview in aging mail clients.
- Photos with no transparency: consider JPG or lossy WebP instead of PNG, which is very large for photos.
When in doubt, publish WebP and keep the PNG in your archive so you can always regenerate other sizes and formats without extra loss.
Editing and re-saving
If you edit an image repeatedly, use PNG (or lossless WebP) for the working file. Every time a lossy WebP or JPG is opened and saved again, a little more detail is lost, and the damage shows as blurred edges and blotchy gradients. Export the lossy copy only at the end, from the master. This is the reason many teams store PNG or layered source files and publish WebP: the master stays perfect, and the published copy is small.
When you receive a WebP from someone else, treat it like a finished export: fine for viewing and small edits, but do not expect it to survive many rounds of changes.
How to measure the difference on your own site
Do not trust a general rule when your own pages are the test. Pick the five heaviest pictures on a typical page, save each in both formats at a few quality levels, and note the sizes in a small table. Then open the browser developer tools, load the page with caching disabled and compare the total transferred bytes. A page that loads in 1.8 seconds instead of 2.4 is a visible gain, and the data makes it easy to justify the change to a client or a manager.
- Test on a throttled mobile connection, since that is where size matters most.
- Look at Largest Contentful Paint, which usually points to the hero picture.
- Repeat after changes to confirm the improvement is real and not a cache effect.
- Record the settings that worked so colleagues can repeat them.
Serving the right file to each visitor
Modern pages can offer more than one version and let the browser choose. The picture element lists a compact source first and a universal fallback last, so a visitor with an old program still sees something. Combine this with responsive widths so phones receive a small file and large screens receive a bigger one. Content management systems and image CDNs often automate the choice, but check the output instead of assuming it works.
For marketing emails and documents, stay with the safest option, because you cannot control the viewer. Compressing a photo for a website explains the size side, and migrating a whole site in bulk covers the practical steps for a large library.
Mistakes people make with web graphics
The most common errors are exporting at several times the displayed size, using a lossless file for a photograph, forgetting dimensions so the layout jumps while loading, and re-saving a lossy copy over the master. Another is judging quality at 25 percent zoom, where compression damage is invisible, and then discovering blurry text on a retina phone. Always inspect at actual size, and keep dimensions and alt text in the markup.
A decision checklist you can reuse
Ask four questions before exporting anything for publication. Will it be edited again? Will visitors see it in an old program? Is the file mostly flat shapes or mostly photographic detail? Does load time matter more than perfect fidelity? If the answers are yes, no, photographic and yes, choose the compact option. If the answers are reversed, stay with the lossless one. Write the outcome in your project notes so a teammate makes the same call next time instead of guessing from habit.
Team conventions that prevent mix-ups
Agree on folder names for masters and published copies, such as source and web, and never mix them. Put the export settings in the project readme, including quality, maximum width and naming pattern, so every contributor produces matching files. Review new uploads in a quick weekly pass to catch oversized pictures before they reach production, because one forgotten hero file can undo weeks of careful tuning.
Step-by-step

Common mistakes to avoid
Pro tips
Frequently asked questions
Is WebP better than PNG?
For website delivery it is usually smaller, but PNG is more widely compatible and always lossless.
Does WebP support transparency?
Yes. Transparent areas are kept.
Why did my WebP come out larger?
Small flat graphics can already be tiny as PNG, and WebP can add overhead, as it did for our 1200 × 1200 sticker.
Is WebP lossless?
It can be lossless or lossy. The quality slider controls the lossy mode.
Are my files uploaded?
No. They are converted in your browser.
PNG is the safe master format and WebP is the compact web format. Measure with your own files: a screenshot may shrink by ninety percent, a tiny flat sticker may not shrink at all.
Related guides
Browse more: all image guides · Image to WEBP Converter